After downloading phpwcms from the project site and depacking, you can download all files and folders with an ftp program onto your webspace. After uploading, the content of the folder should look like this image.

Installation Manual
(Stand: Version 1.3.3)
Before you begin
What requirement do you have to fulfill for working with phpwcms?
- Webspace
- PHP up from version 4.2.1, better would be up from 4.3.4
- MySQL
- GD 1 or GD2 (optional)
- Image Magick / Ghostscript (recommended)
Upload of phpwcms
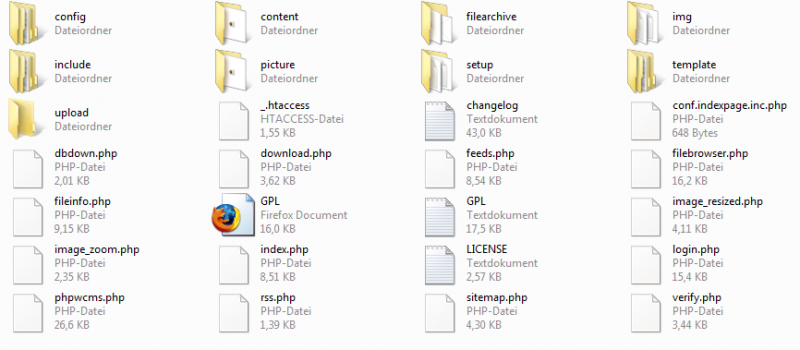 |
| Image 1 - Folder View |
Adjusting the file and folder rights
Now you have to adjust the rights that are necessary for a proper function of phpwcms to the following files and folders. You can use your preferred ftp program to set them.

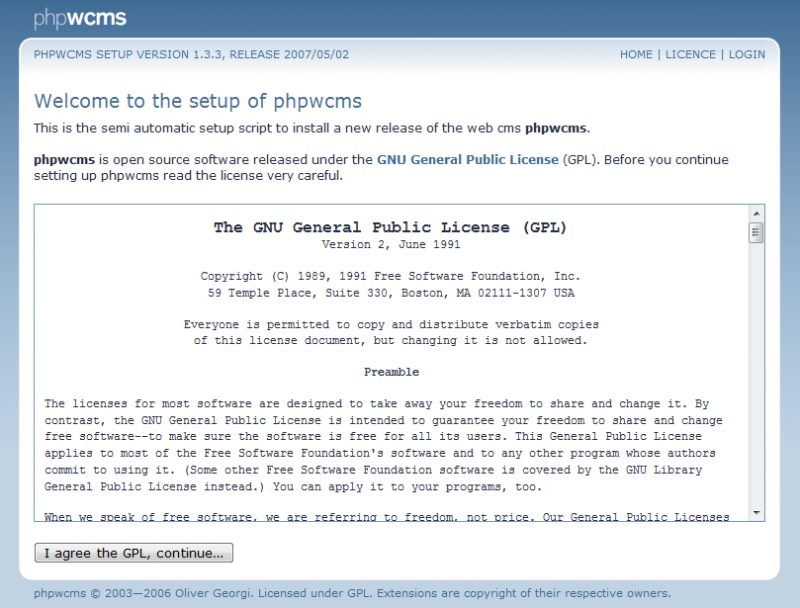
Start of the installation
|
Now you call the install script in your browser via the following path: |
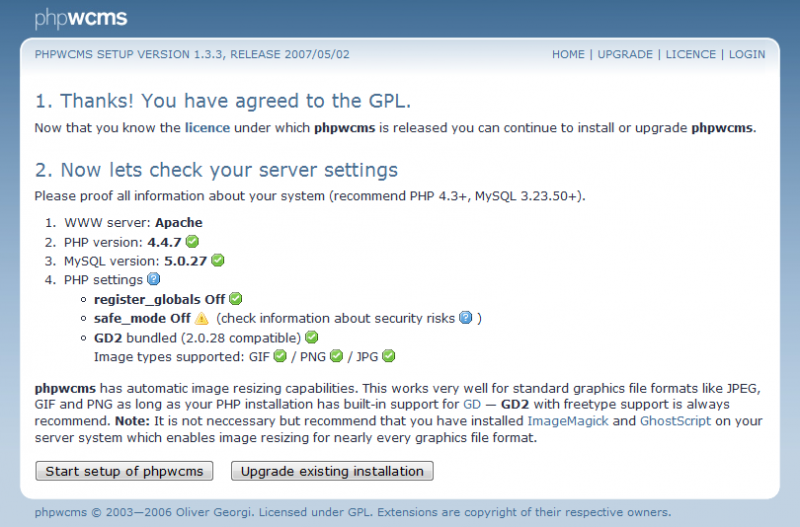
Checking of the server settings
|
2. Now lets check your server settings (Image 3). |
 |
| Image 4 - Database Settings |
 |
| Image 5 - Charset |
 |
| Image 6 - Creation of the Tables |
 |
| Image 7 - Confirm Creation of the Tables |
 |
| Image 8 - Tables were created |
Datatabase settings
and creation of the tables for phpwcms
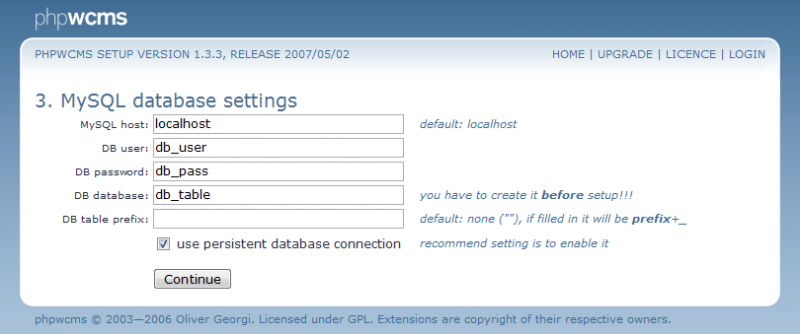
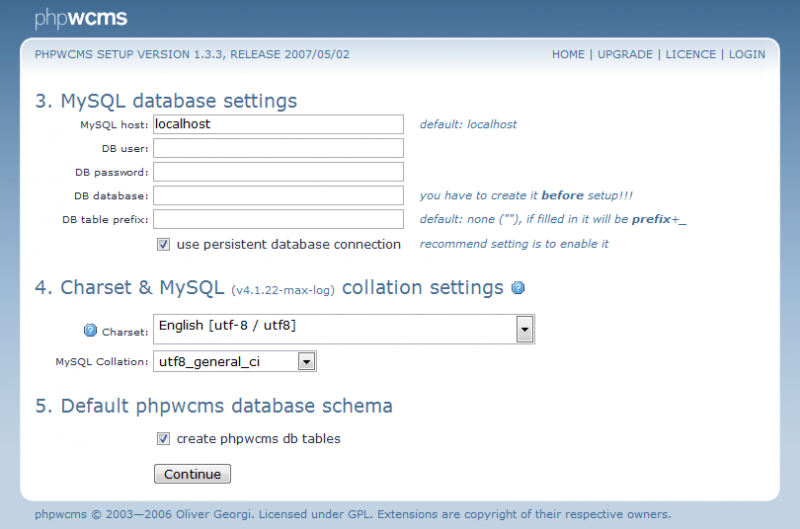
3. MySQL database settings (Image 4)
Fill the fields for your database:
MySQL host: Mostly "localhost". It can also be an IP address. Check the right settings with your provider.
DB user: Insert here the username for the database.
DB password: Insert here the password for the database.
DB database: Insert here the database name.
DB table prefix: Only fill this field when you want to execute several phpwcms installations in one database.
use persistant database connection:
Click then onto "Continue".
4. Charset & MySQL (xxxx) collation settings (Image 5)
Choose now the charset, then click onto "Continue".
5. Default phpwcms database schema (Image 6)
Check "create phpwcms db tables". With this setting you say phpwcms that it shall create the tables for itself in the database. Click again onto "Continue"
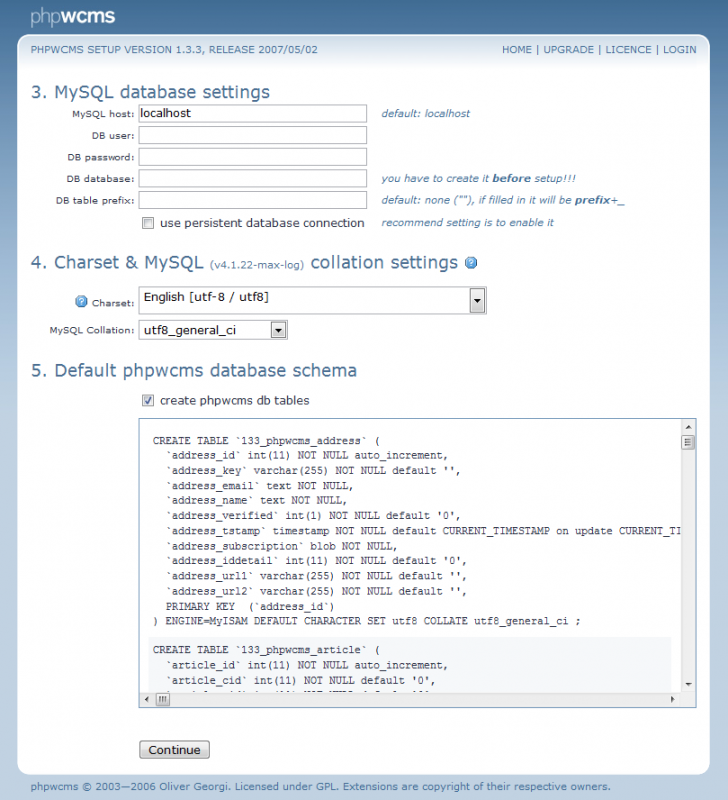
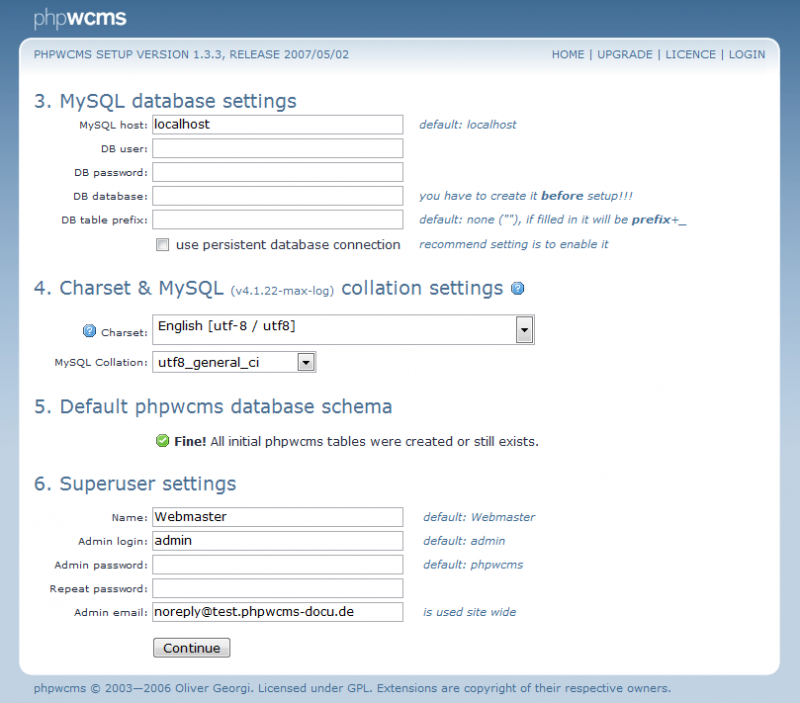
(Image 7) Here you see a textbox with the information what tables will be created. Press "Continue" for the creation of the necessary tables. If you have inserted the right database settings, you should see the following: "Fine! All initial phpwcms tables were created or still exists" (Image 8).
Press "Continue" to come to the creation of the admin account.
 |
| Image 09 - Create Administrator |
 |
| Image 10 - Confirm Administrator |
Creation of the Superuser
6. Superuser settings (Image 9)
Now the Superuser / Administrator account will be created.
You will see the following fields:
name: The inserted name will be used as the author in articles. Standard is "Webmaster"
Admin login: Insert here your login name. Standard is "admin"
Admin password: Insert here your personal password.
Repeat password: Confirm here your inserted password. That avoids spelling errors.
Admin email: Insert here your email address. Standard is "[email protected]"
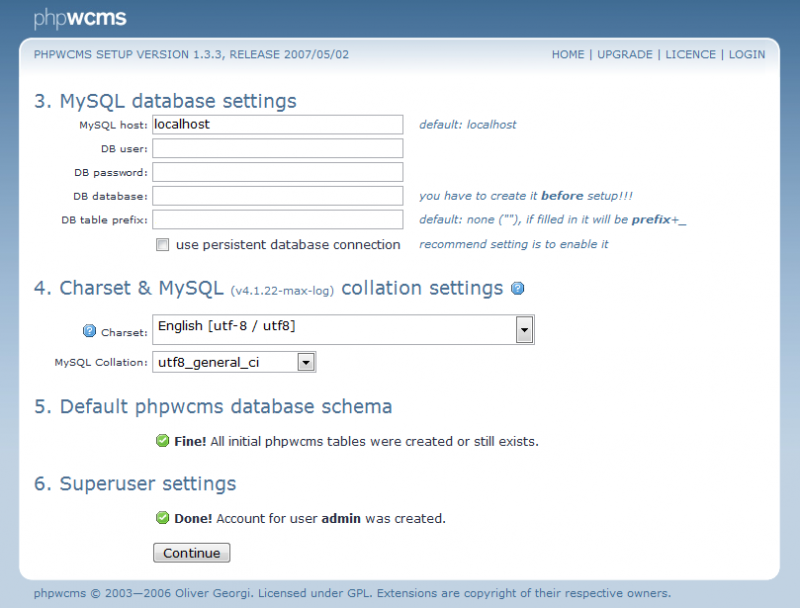
Press again "Continue" and you will get a confirmation message that the superuser / administrator has been created: "Done! Account for user Admin was created"(Bild 10).
Press "Continue" to get to the path and email settings.
Path and email settings
|
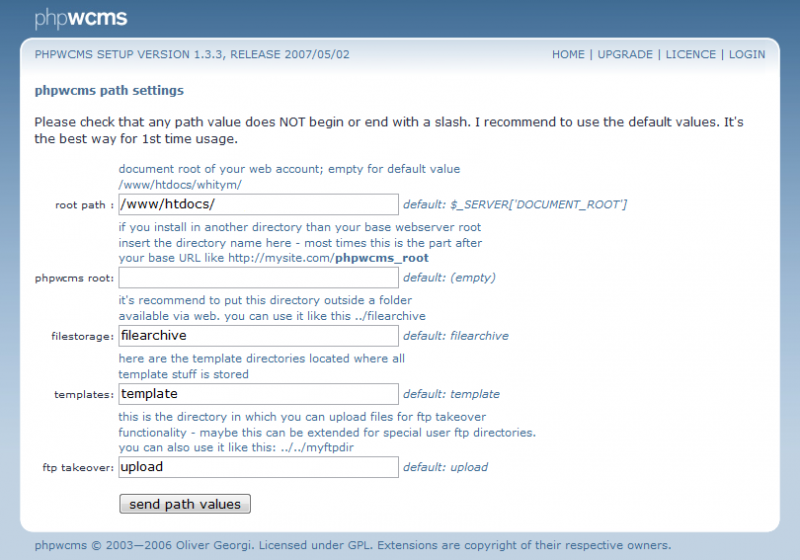
7. Path settings (Image 11) |
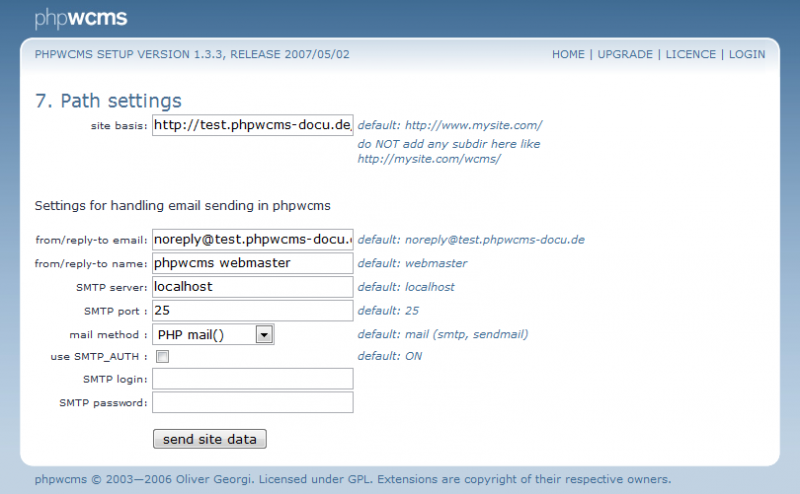
Path and Folder Settings
|
Here you don't have to change anything. |
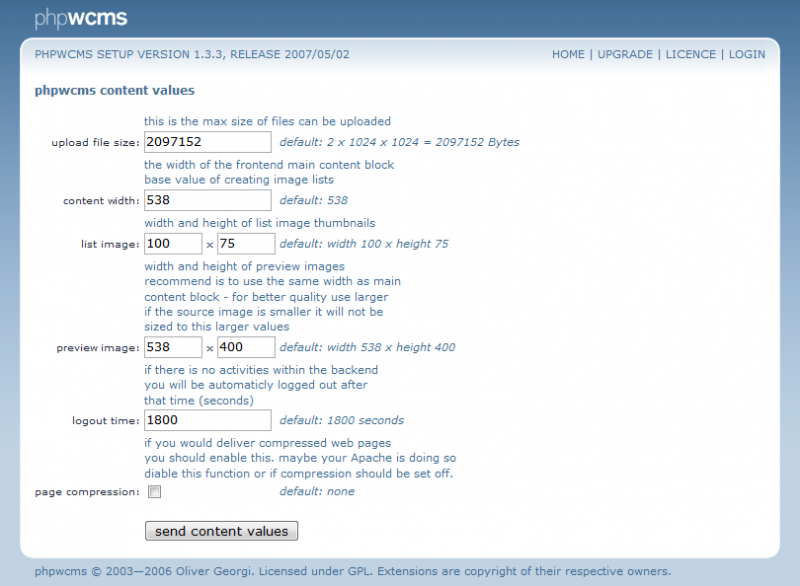
Content Settings
|
Here you can make some settings - but is is not necessary for now.
"upload file size" sets the maximum size of a file that can be uploaded using "File". "content width" sets the width of the main content area. "list image" sets the size of the thumbnails. "preview image" sets the size of images in normal view. "logout time" sets the automatic logout function after a period of inactivity. Standard is 1800 seconds, that means 30 minutes. "page compression" sets the usage of a page compression.
These settings are later changeable in "config/phpwcms/conf.inc.php". Press "Send content values" to go to the last step. |
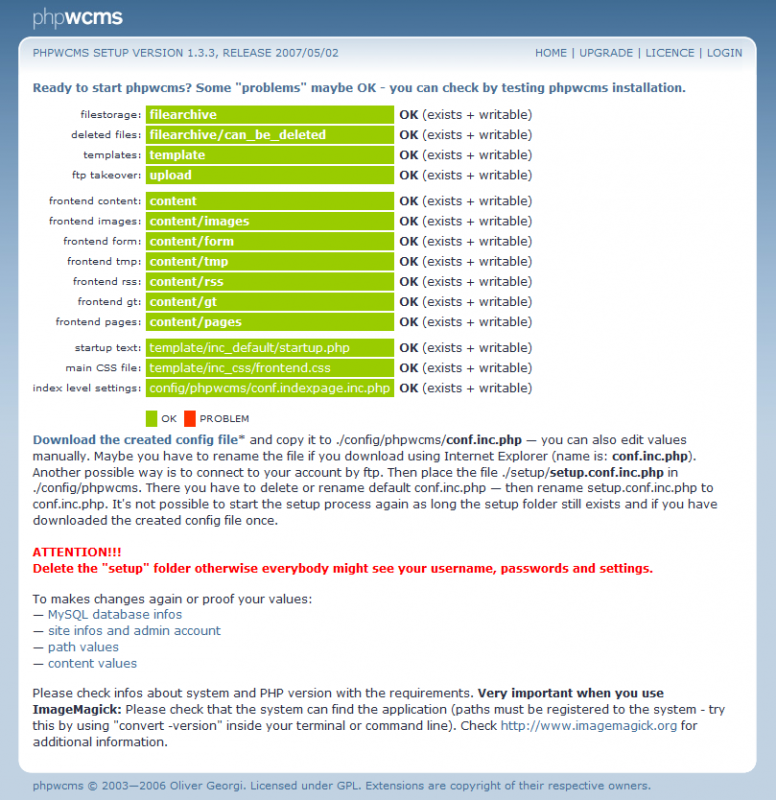
Create and Upload conf.inc.php
|
If all went smothly until now and there is not a path oder rights problem, all bars should be now green as shown in the image. Note: For security reasons the name of the login file login.php can be renamed in conf.inc.php since the version V1.4.2-r341. |
URL:http://www.phpwcms-docu.de/index.php?installation_en